Intro
I have couple of places in my home that I am interested to know how good the air quality is, how much is the temperature and etc. Obviously, it is not expected to spend couple of hundred dollars to measure those using the EnviroSense Pro. So, a cheap reliable solution would eb something I am after in this project.
I have decided to use the Bosch BME680 I talked about in post #6. Instead of my favourite ESP32 I picked his older brother ESP8266 because of their reasonable price. And lastly, I grabbed one of LCDs I had in my drawer which I randomly purchase in a hope to use them someday somewhere and turned out to be such a terrible purchase, more on that in below.
Bosch BME680
As discussed in my post #6 I have been using these sensor for quite a while using the manufacture library BSCE in my office notification system. They are affordable, provide enough information and easy to implement (except getting the library to work with Arduino library).
You need to download the library and make some changes according to the library GitHub webpage based on your platform. As soon as you know where to look for, it is straight forward.
The sensor can measure:
- relative humidity,
- barometric pressure,
- ambient temperature and
- gas (VOC).
This is the second one I am using, and I was interested to know how accurate/precise they are. In absence of any professional calibrated tool, I decided to do the least I can do and just let them run side by side (The Pico is located next to my laptop, that should explain jumps in the temperature).
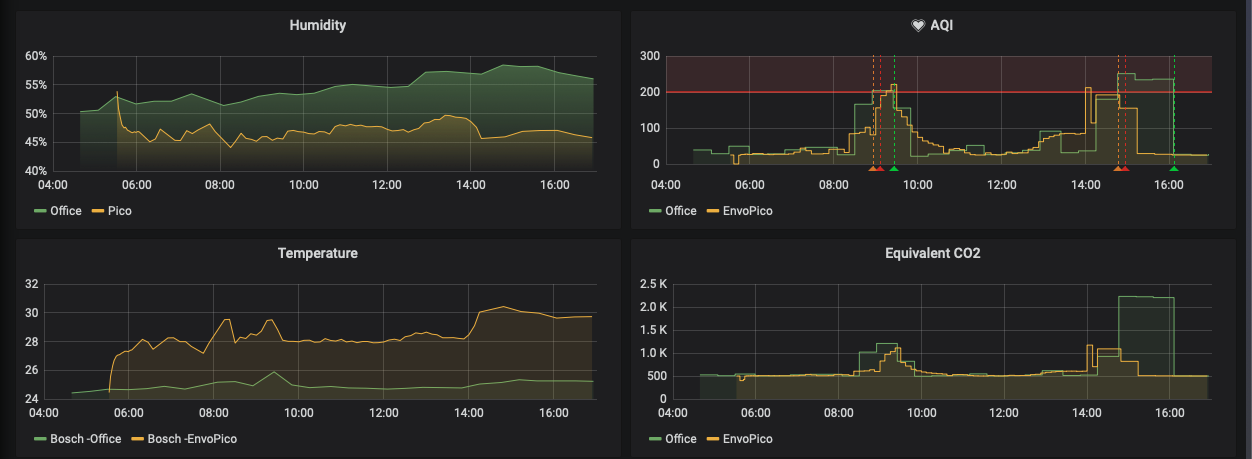
If we forget about the temperature, I still cannot understand why this difference in the measured humidity between two sensors exist. The AQI for both follows the same pattern that could be seen as a positive behaviour. In addition to difference in their location, I must admit that the Pico had been running for couple of hours and whether this could have any adverse effect on the sensor calibration needs to be studies in the datasheet.
ESP8266
ESP8266 has many limitations compared to ESP32 that makes many think it is obsolete, yet its price point, simpler design, and availability of many ready to use modules and shield have been keeping the board popular.
I am using WEMOS D1 mini, it’s easy to work with. Just e noted that the pin naming in Arduino IDE contains D like D4.
I am also using a recycled 3.6v battery so the board is powered up through the 3.3 pin. Look at the picture below to see how well designed this board in terms of giving the user power management options.
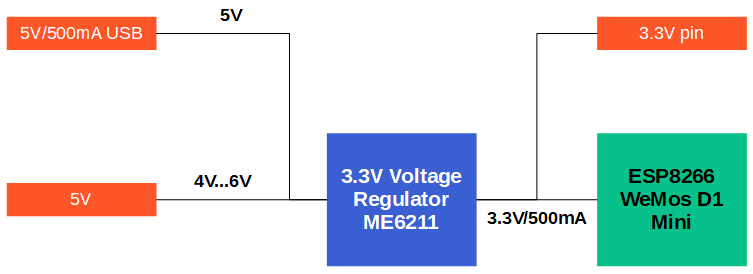 Image credit: diyi0t.com
0.96” 80x160 RGB IPS TFT Display
you see why I bought this? look at the name, it has everything you can ask for. I bought mine from AliExpress and you can guess that like any other gamble this time I was out of luck. The first problem was that the pin naming is completely wrong.
While the board uses ST7735 chip and driver and it is clearly a SPI driver, the pin naming are SDA and SCL. It took me a while and Google to find the correct naming and here they are if you are wondering:
- SCL -> CLK
- SDA -> MOSI
Also, if you end up using the Adafruit Library please be advised that the RST pin of the display MUST be connected otherwise nothing will work!
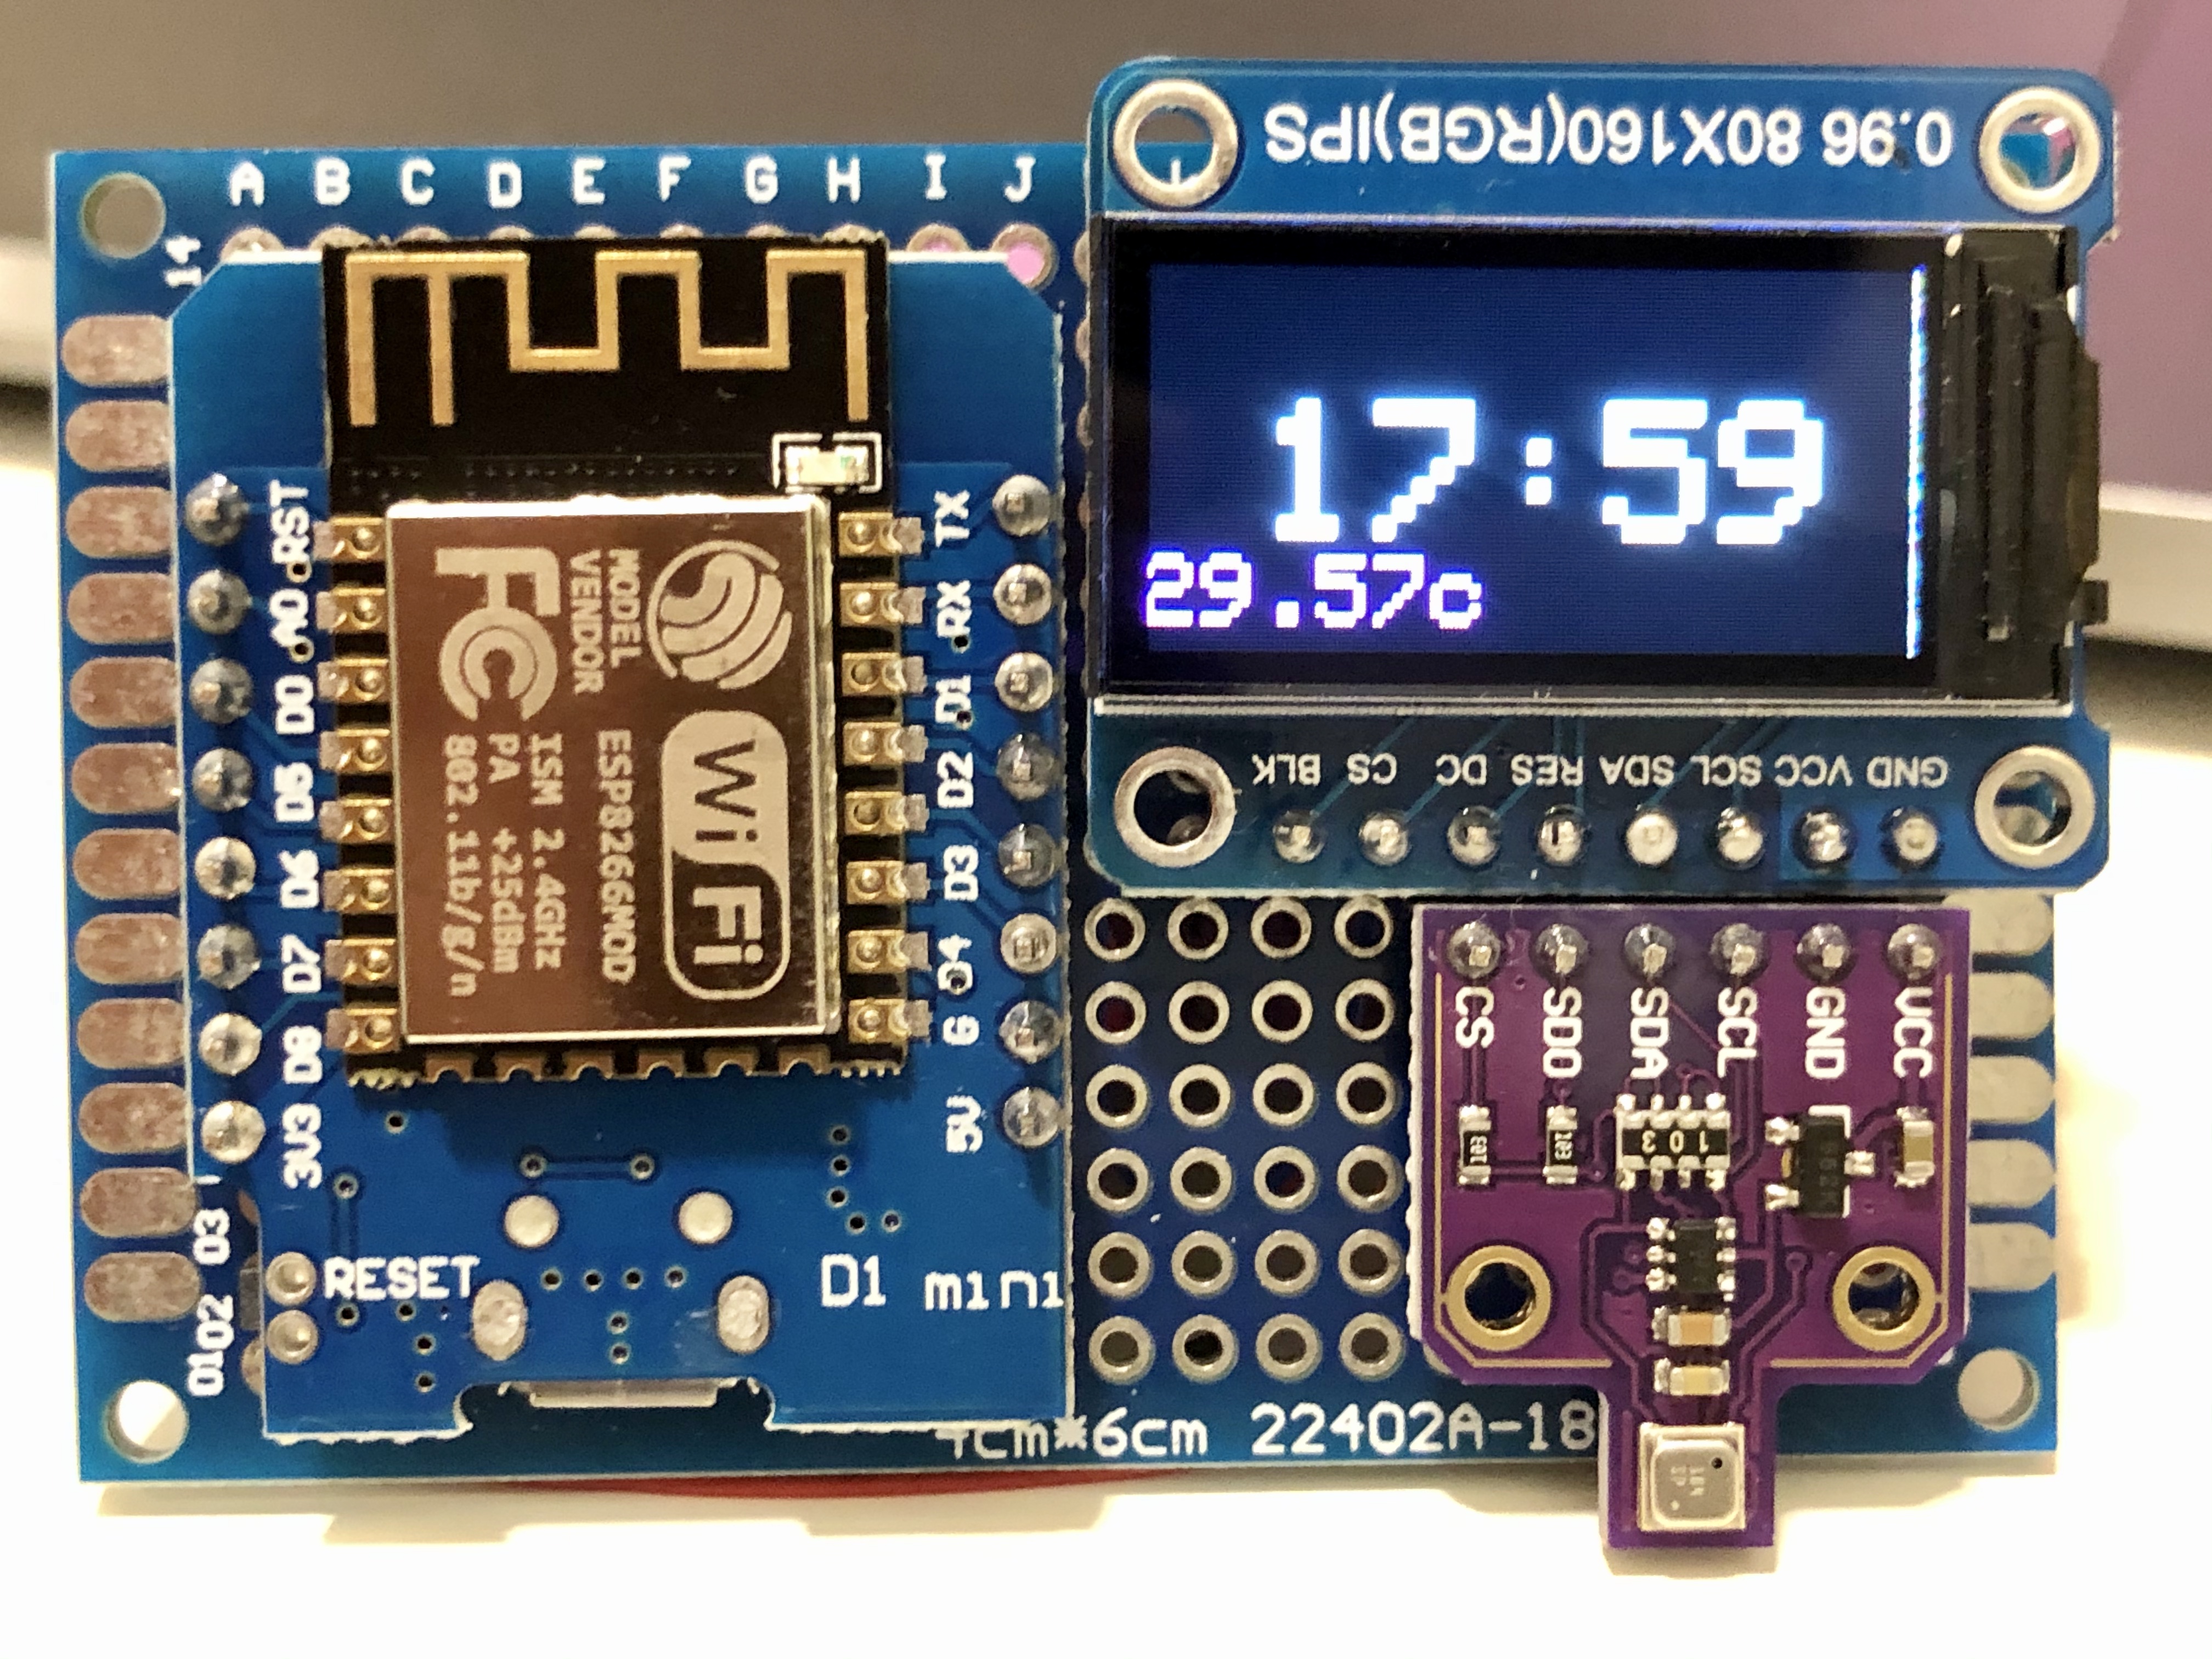
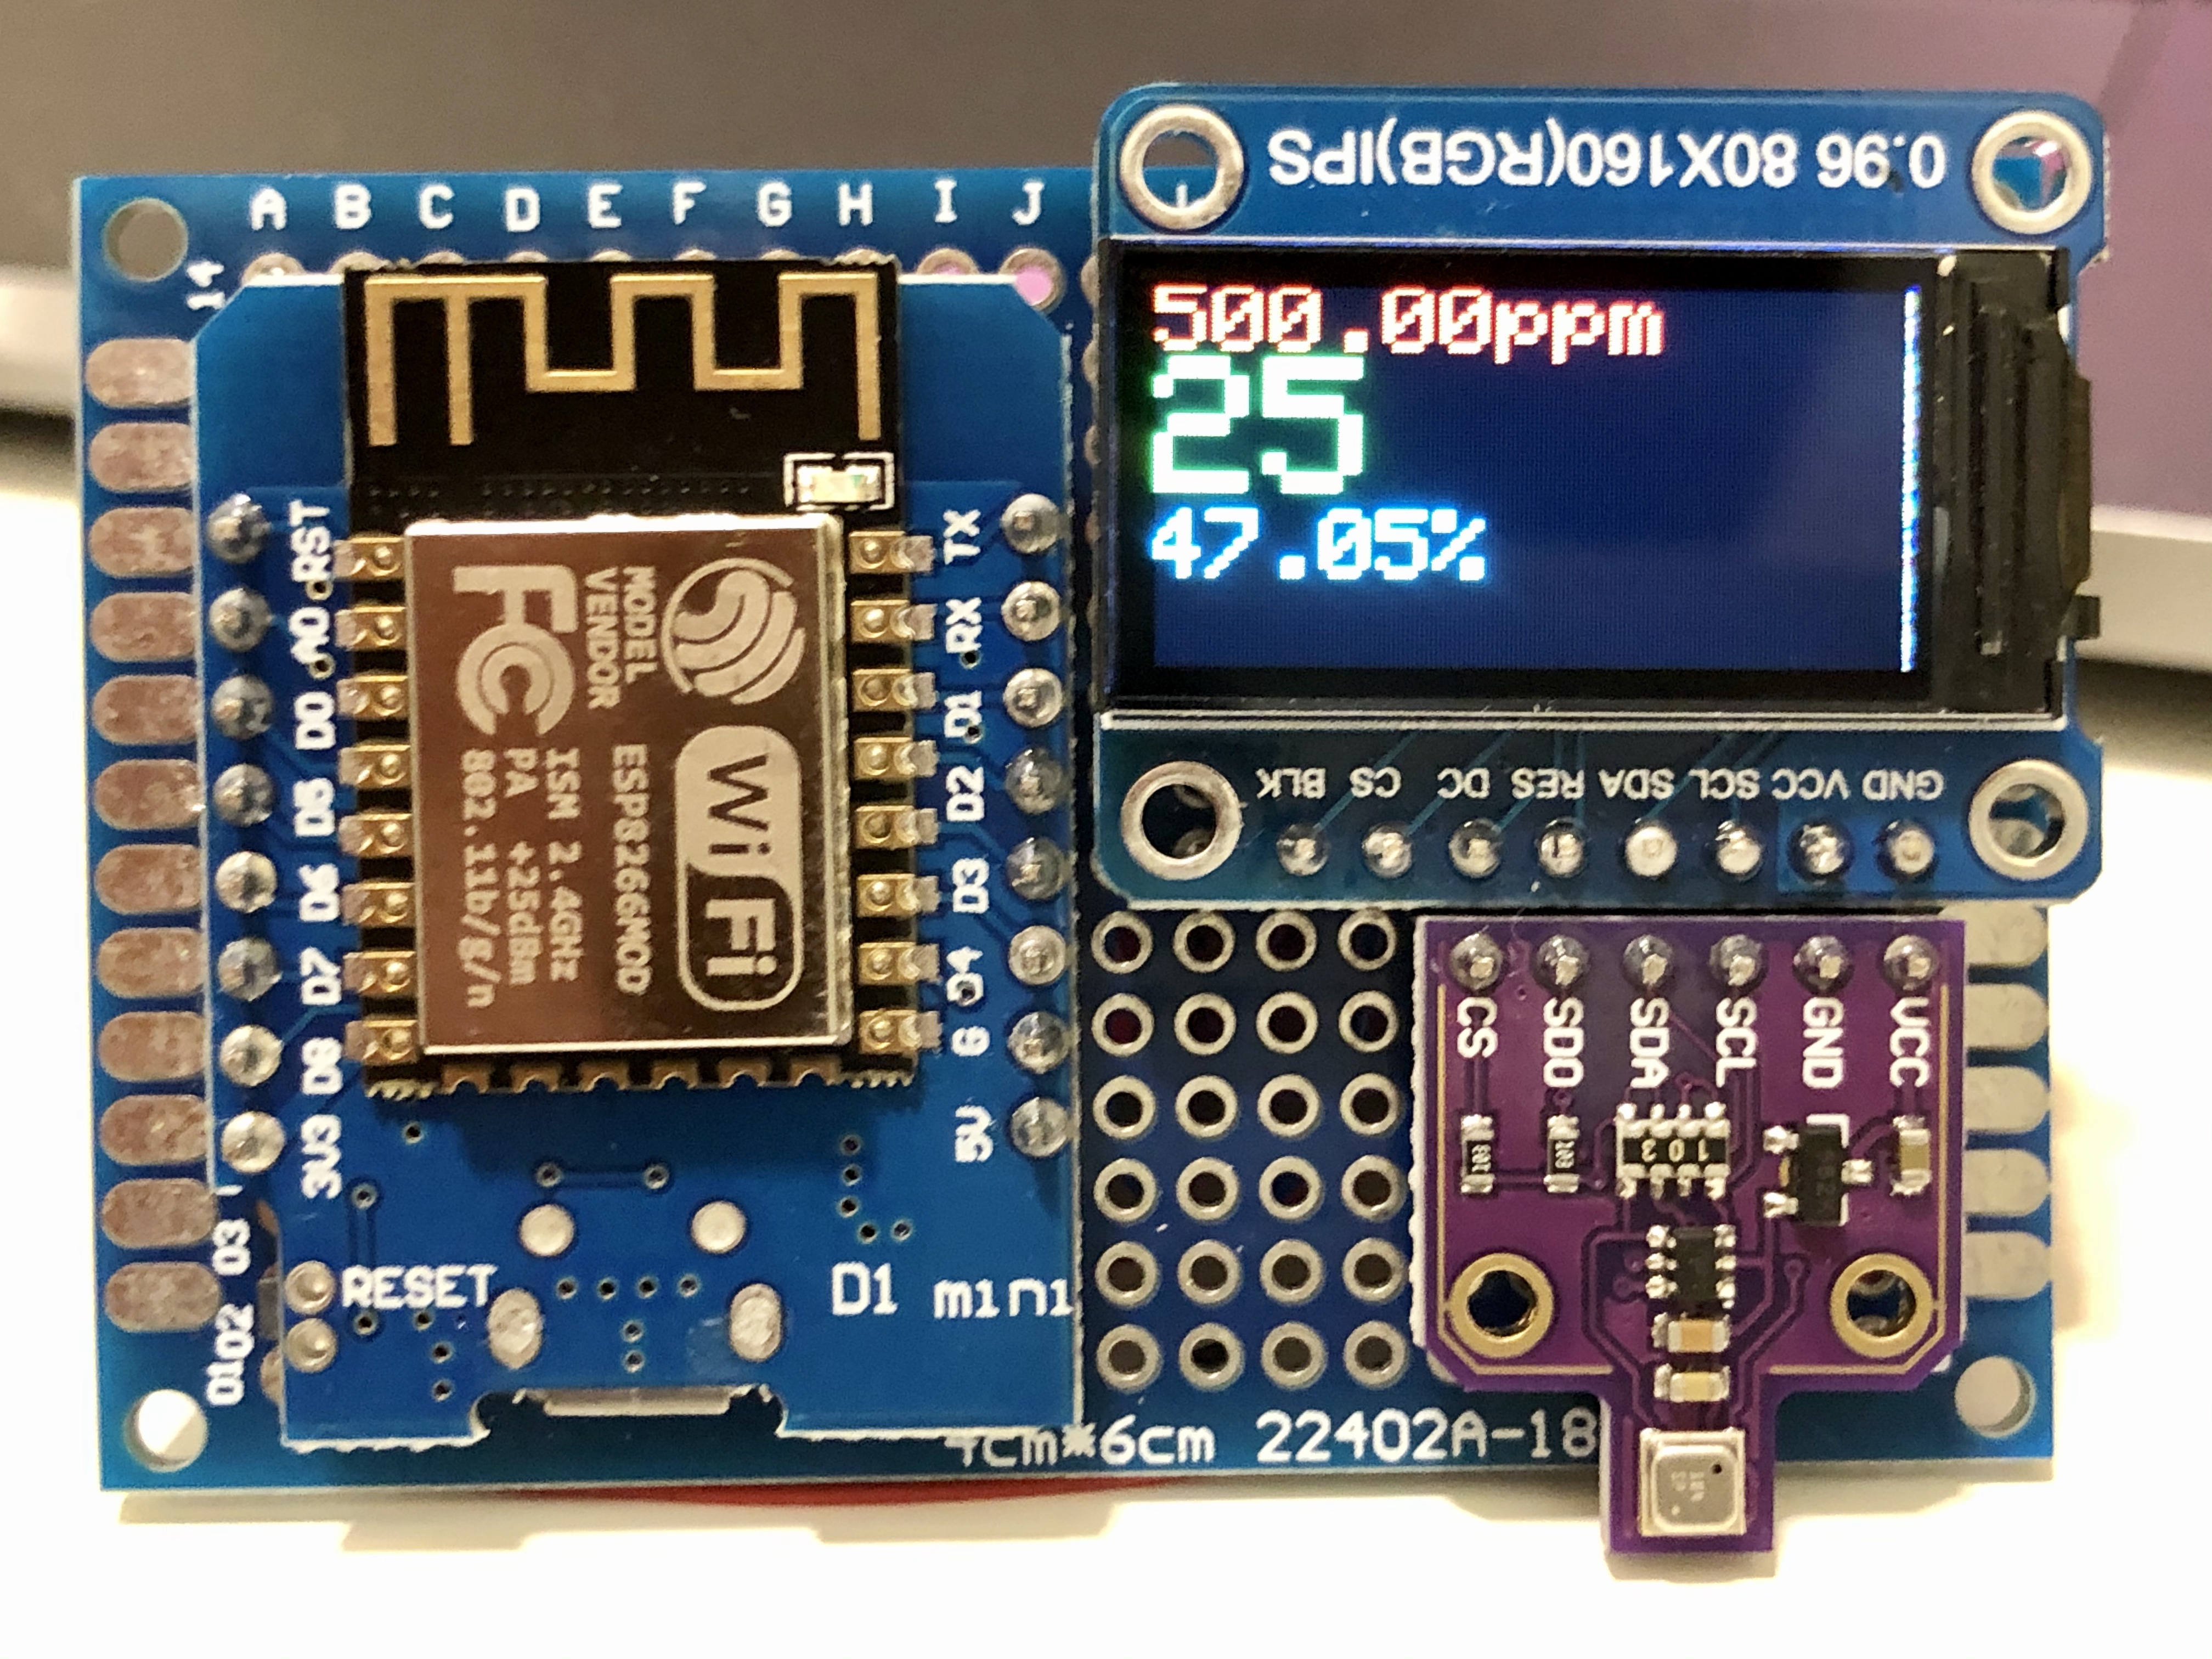
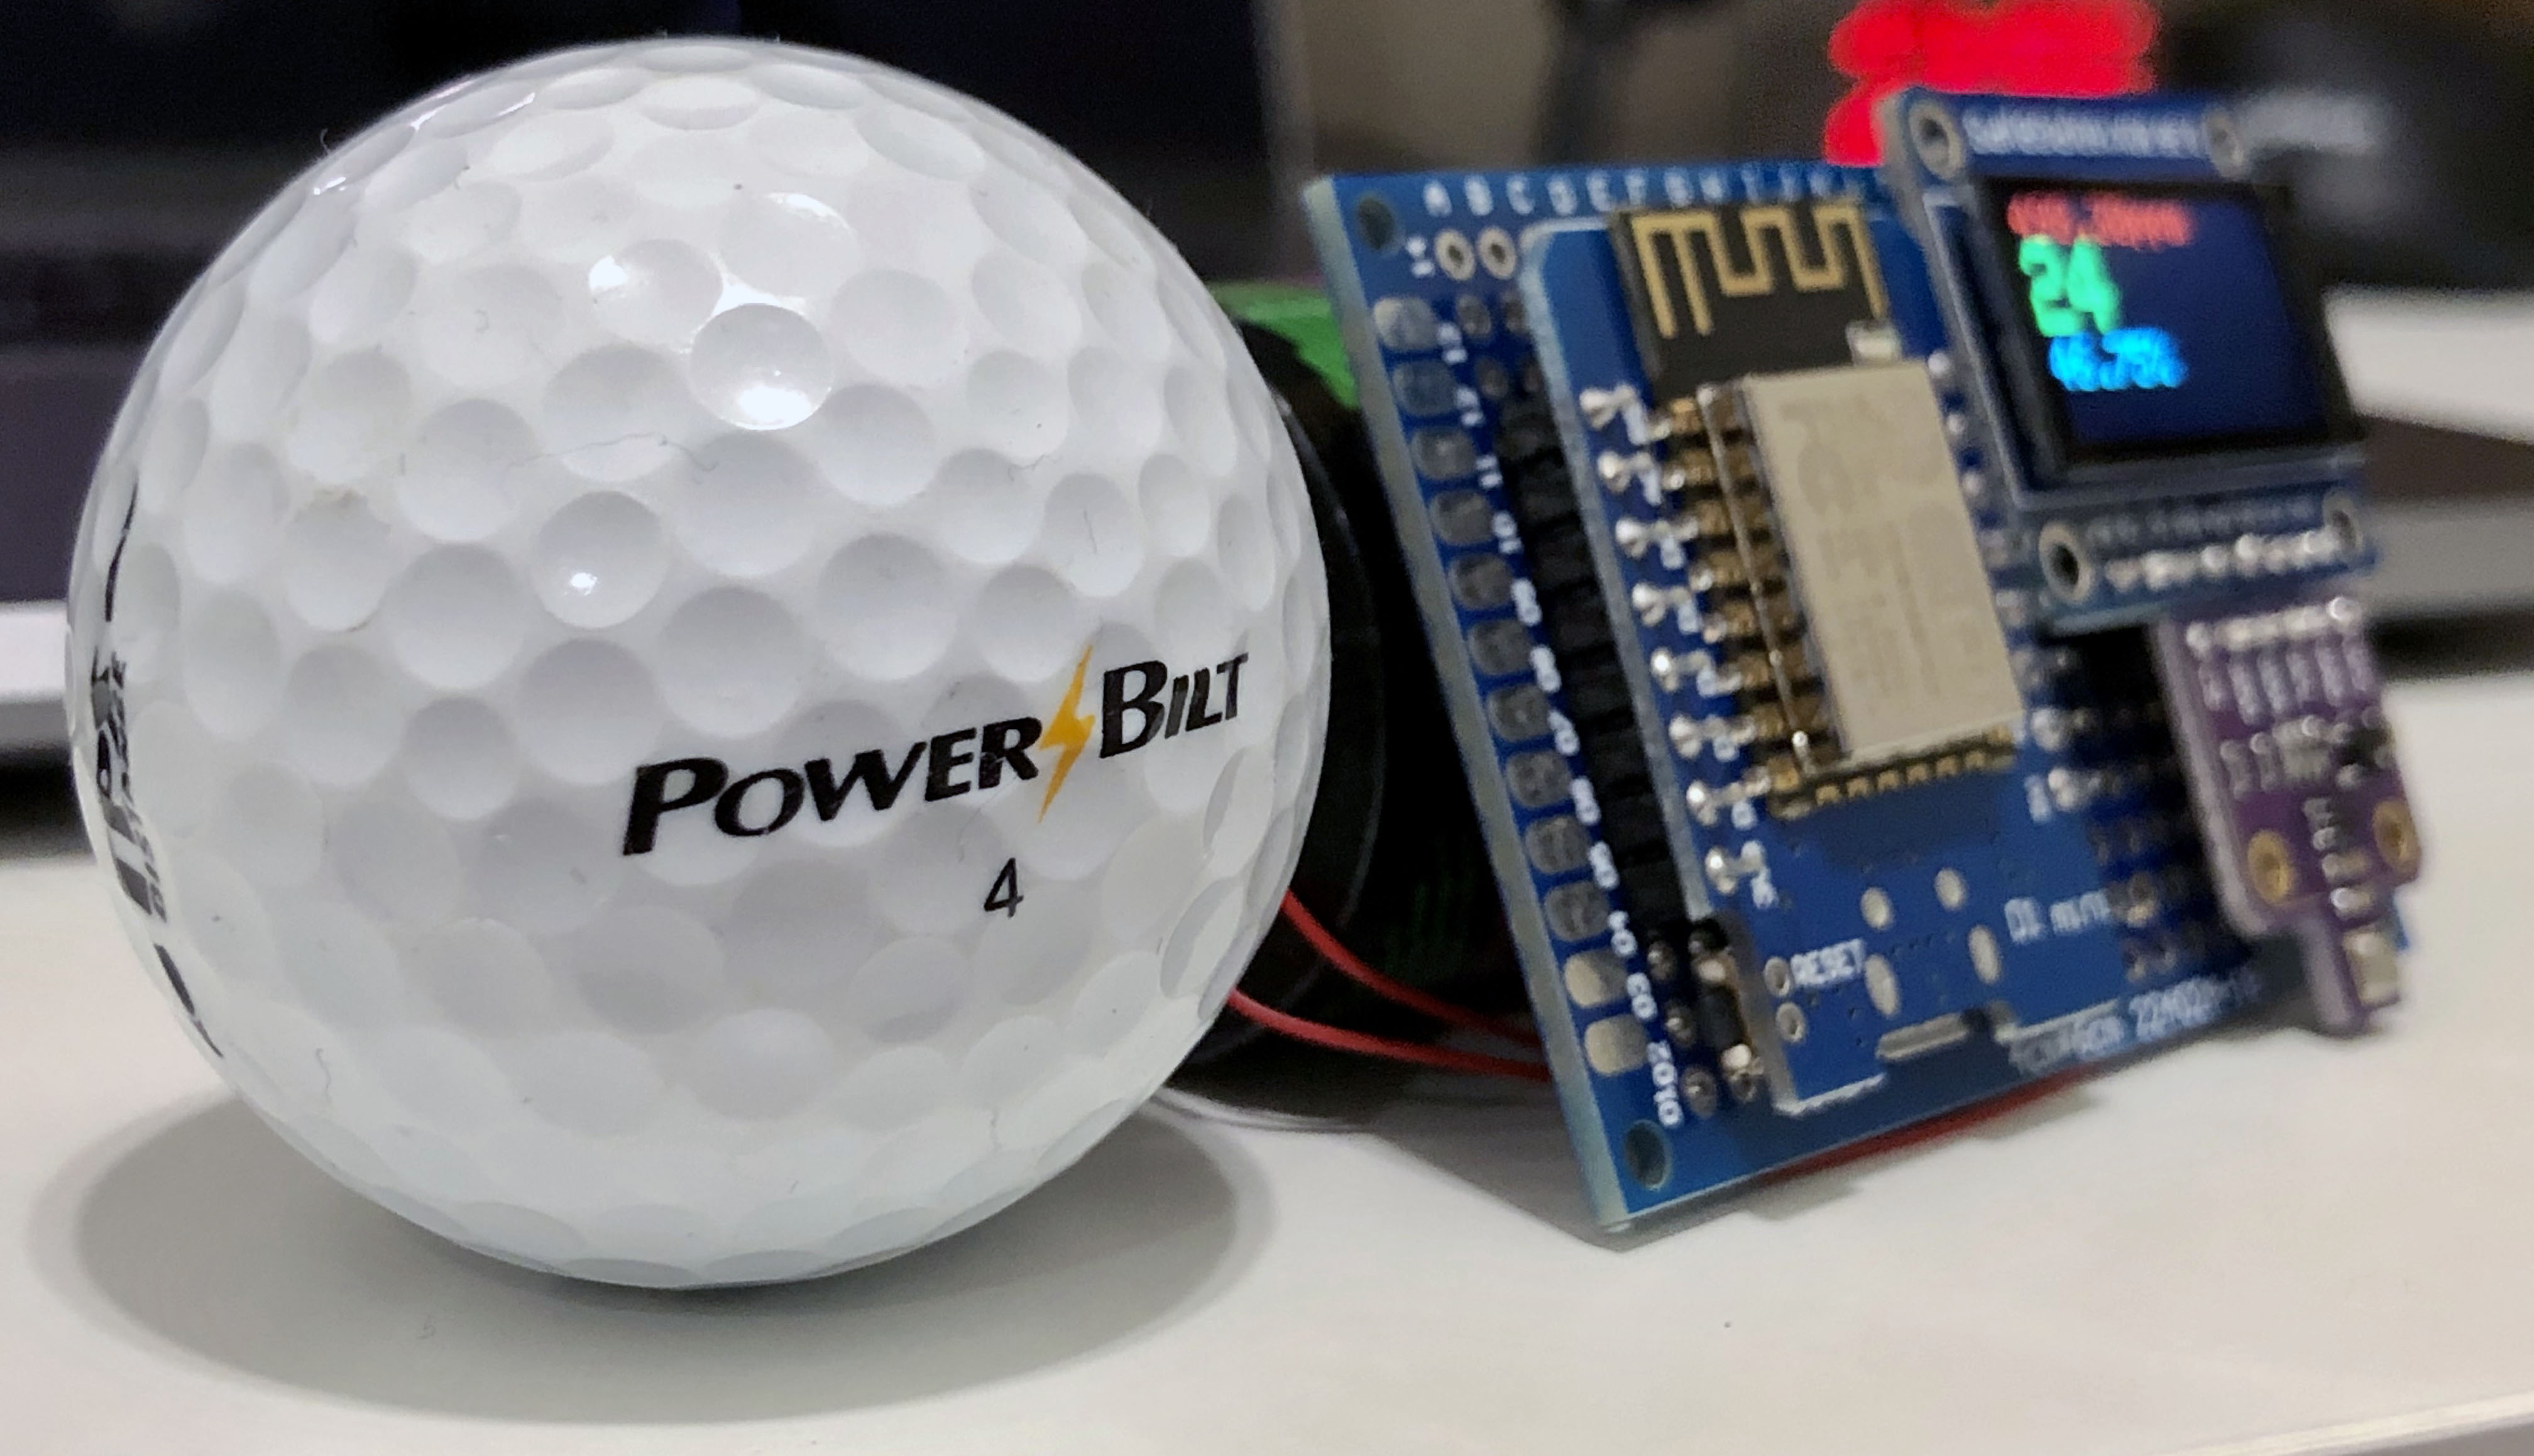
The EnviroSense Pico
Below you can find couple of pictures, my next step is to make the PCB and …
*You may have noticed that the display is oriented upside down, this is intentionally as I noticed that the heat from display and BME680 board causes some wrong reading, the logical solution was to put the sensor at the button!